DSH9UNGS83YB
Computer Tips, Blogger tips, Hacking Techniques, How to solve Computer Problem, Windows 7 , Windows 8, SEO tips, Online Earnings,
Wednesday, 11 July 2012
Monday, 9 July 2012
Windows 8 Features & Release Date
Windows 8 Features & Release Date
Although Windows 7 has done exceptionally well since its release, Microsoft has been constantly working to make the next version of Windows a better one by further improving upon the existing features, and have added new impressive Windows 8 features along with a stunning UI.
Microsoft released the early version of Windows 8 on a prototype tablet last week. Those of you who would like to taste and experience the all new Windows 8, you can download the Developer Preview, which is currently in pre-beta version. The developer version shows off the current stage of the OS. It is available for free download, and comes in three different packages:
- (1) 64-bit version – Only the OS
- (2) 32-bit version – Only the OS
- (3) 64-bit version with developer tools
Windows 8 Features
Windows 8 offers a number of new Windows 8 features from its all new UI to WindowsApp Store and improvised security features . Here’s a list of new features and improvements which will arrive with Windows 8:
Support for both x86 PCs and ARM tablets
Windows 8 is the first edition of Windows which will work on both ARM based tablets and traditional x86 (as well as x32 and x64) PCs based on ARM processors from Intel and AMD.
“Support for ARM-based chipsets, touch, and sensors makes Windows 8 work beautifully on your choice of a full spectrum of devices, such as 10-inch slates with all-day battery life, ultra-lightweight laptops, and powerful all-in-ones with 27-inch high-definition screens,” Microsoft contends, in a Windows 8 Guide distributed with Windows Developer Preview
Windows To Go
The “Windows To Go” seems to be an exciting feature that basically allows Windows 8 to boot from a USB device (called as Live USB), including user’s programs, settings and files. The feature is designed to work with both USB 2.0 and USB 3.0, and on both legacy NIOS and UDFI firmware. However, Microsoft says that a user will not be able to “Hibernate” with this feature.
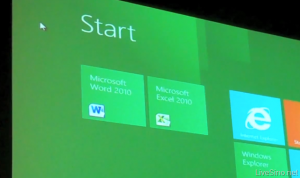 “Windows To Go is a new feature in Windows 8 that enables enterprise administrators to create USB drives containing complete, managed Windows images that users can use to boot and run Windows on any Windows 7 or Windows 8 capable computer. Windows To Go makes it possible for employees to use a managed device whether they work from home, a client office or in a free seating environment. This session will discuss Windows To Go, its hardware requirements and building compatible and complementary software.”
Another interesting thing about this feature is that, if the USB drive is removed, Windows will automatically freeze, but will continue to operate if the USB drive is inserted back in the next 60 seconds after removal.
Windows Store
To compete with Apple, Windows has confirmed the introduction of a Windows Store, similar to Mac App Store, which allows users to browse through Windows applications, while developers can publish their Metro-style apps on Windows 8 devices.
Few days back, Microsoft gave a strategic view of its app store, and gave a quick demo on how it works. Microsoft revealed that the Windows App Store will be the only place where users can access the Metro-styled apps. Here’s a quick demo that shows how users will be able to buy their apps:
Windows 8 User Interface
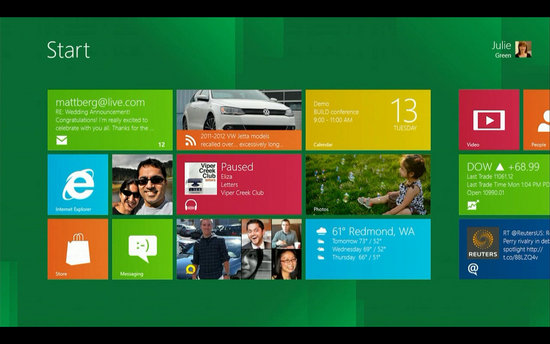
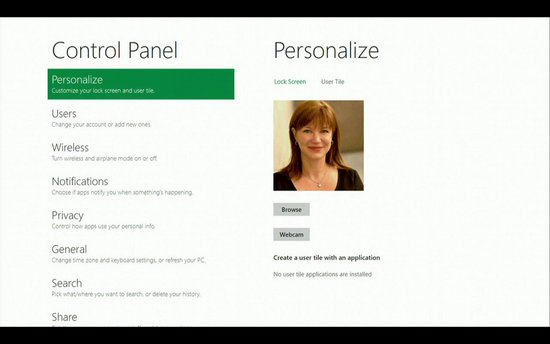
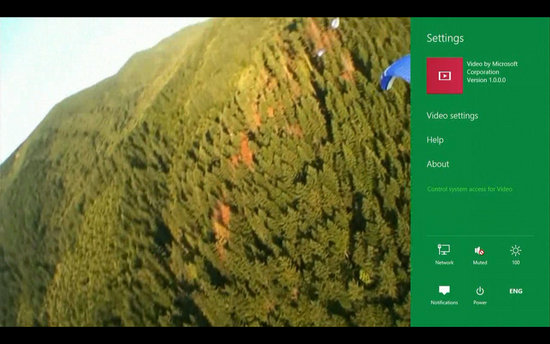
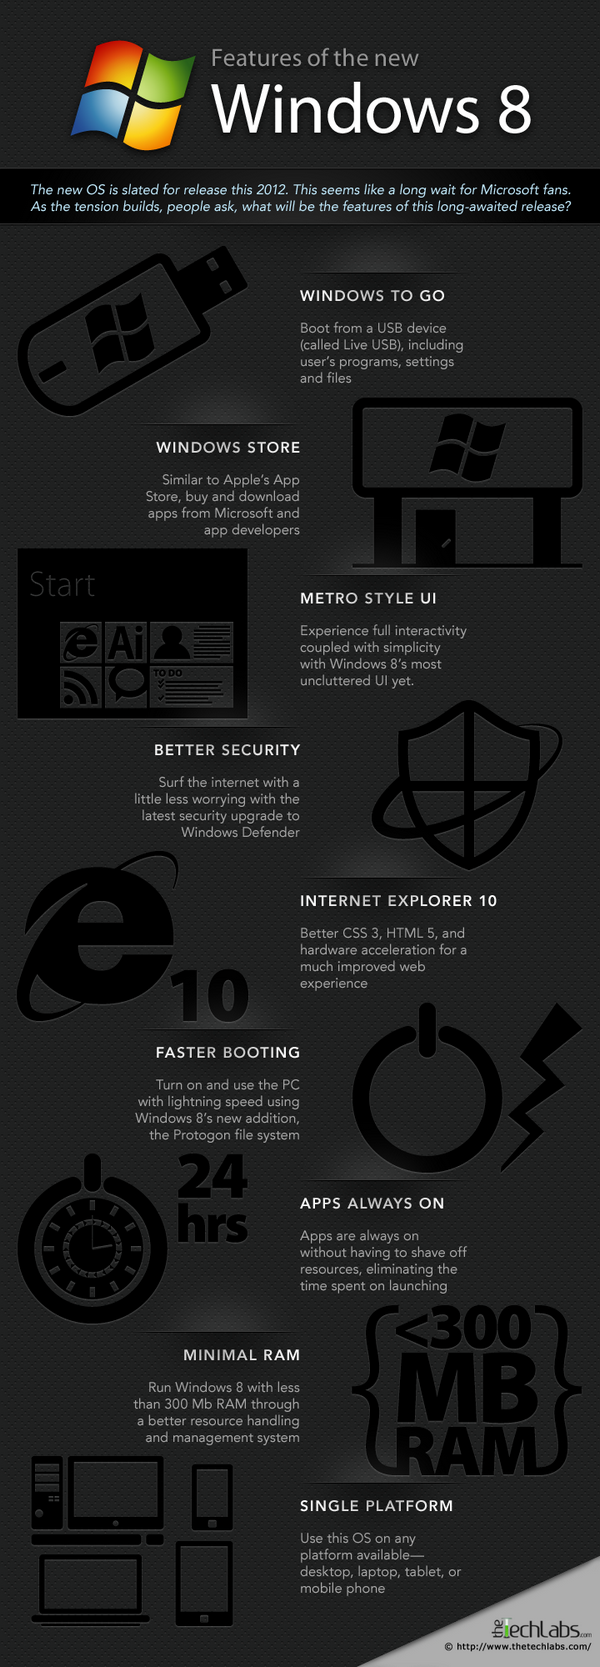
Speaking about the UI, Windows 8 certainly has got a mind blowing interactive UI, which has been extensively redesigned to a “Metro-style” design, which shows the most important information to you, embodies simplicity, and gives you full control over it. The UI is designed to provide a fluid and intuitive interaction and navigation with touch, or a mouse and keyboard.
Julie Larson-Green, Corporate Vice President, Windows who stated: “Everything that’s great about Windows 7, is better in Windows 8,” gave a quick hands on look at the Windows 8 user-interface. Here are some of the screenshots she released:

Windows 8 Minimum System Requirements
It is reported that Windows 8 is expected to have the same system requirements as Windows 7, and will run on existing machines that run Windows 7. Here are the following minimum system requirements to run Windows 8:
Processor: 1GHz or faster 32-bit or 64-bit processor
RAM: 1GB (32-bit) or 2GB (64-bit)
HD Space: 16GB for 32-bit (or 20GB for 64-bit)
Windows 8 & Cloud Computing
It has been reported in the official Microsoft blog that Windows 8 will be tied to Microsoft’s SkyDrive , which will allow users to access their digitally stored data via Windows 8 on their computers, laptops, mobile devices… The industry’s leading cloud computing provider, Rackspace explains exactly how cloud computing works.
Windows 8 Bringing Kinect to Laptops?
Microsoft is also planning to build Kinect sensors into laptops. Prototypes have already been released, and were confirmed to be official. The sensors would be placed where the webcam is currently placed, and there could be an IR LED at the bottom of the screen. If Microsoft techs manage to drive the price of sensors down, it might even become a standard feature. There are also talks of miniaturized Kinect hardware for notebooks.
Windows 8 Release Date
Speaking at Microsoft's Worldwide Partner Conference this week, Tami Reller, VP of Microsoft, explained that the Windows 8 release date was set for 'late October' and the RTM (release to manufacturer) date was penned in for the first week of August.
Sunday, 8 July 2012
How To Insert Adsense Ads In Blogger Post
How To Insert Adsense Ads In Blogger Post
This will explain how to Embedd adsense ads in between posts body.
1.Generate Parsed code for adsense code because we cannot put adsense code directly in the xml.So parse it using AdParser.
2.After parsing,your ad code Should look like this.
How To Place ad above or below your post header
log in to your dashboard--> layout- -> Edit HTML
Click on "Expand Widget Template" and scroll down to where you see this:-
<div class='post-header-line-1'/>
To place ad above your post header.Paste the code above this line.
To place ad below your post header.Paste the code below this line.
How To Place ad end of your post body
log in to your dashboard--> layout- -> Edit HTML
Click on "Expand Widget Template" and scroll down to where you see this:-
<p><data:post.body/></p>
Paste the code below this line, to show your ad at the end of your post.
NOTE : To Set the Align of your ad , Insert your code like this.
<p align="center"> Your Ad code
</p>
Replace "center" with "left" or "right" for desired alignment.
How to Optimize Google AdSense Most Beneficially?
How to Optimize Google AdSense Most Beneficially?
Google AdSense is basically a way to earn online money through the articles we write. It can be placed on your websites as well if you are interested in getting a steady amount on daily basis. This all depends on the traffic that is welcomed by your website in a set pattern. The idea behind AdSense is to maximize the traffic on your website so that more and more people can come across with the advertisements that are placed on your websites. Most importantly people will check these ads out if they are appealing and attractive. Investing in Google cannot be a bad idea and one way or the other, it will start yielding profits after some time. People want to maximize their revenues earned through Google and if you are a person with similar thinking, then this article is made just for you. All you have to do is keep on reading and you will discover the process that is most beneficial when it comes to making money online.
Introducing DFP (Double click for publishers)
A technical approach to implement but, if once completed can be very much valuable and advantageous. You can easily witness the traffic growth increase in a couple of weeks. Depending on the results you can always increase your investment in order to place a better infrastructure.
Discovering the Most Appealing Creative Combination
If we have to describe the above heading in a single word then it can be the outlook of your website. This includes the color scheme used, font color, background color, URL link color used within the website. Images are also taken into account when talking of being creative.
Positioning Of Google Ads
The positioning of Google Ads on your website page is another technical question that has to be answered perfectly. Are these visible or are available at a place where eyes of your customer can never reach or are never interested in reaching for the ad? Try to mix up the places every month in order to be more creative.
Integrate Your Website with Custom Google Ads
The more you can customize, the more is beneficial not only for you but also is very much attractive to the traffic that is visiting your website. When it comes to classified ads, custom Google ads can be very much helpful.
Try to Manipulate Between All Ad Categories
If you are choosing among the ad categories, it means that you are losing a major chunk of your customers. There might be customers who are visiting your website but are not very much positive towards the ads they see on the page.
Try to follow these simple steps when working with Google AdSense and maximize your profits.
How Simple Changes Can Double Your Adsense Income?
How Simple Changes Can Double Your Adsense Income?
If you have been making some money as Google Adsense revenue from your website or blog, you should be aware of the fact that earning money with Google Adsense is not really that easy. In this article I’m not going to discuss how to generate revenue with Google Adsense ads on your site, but I will surely amaze you by showing how simple changes in ad placement, position, colors and size can literally double your Adsense revenue.
Three important facts about Adsense ad placement.
Less means more:
It has been proven that the very first ad being load on your web page will have the highest CPC (Cost Per Click) value. For example, if you are using all of three ad blocks (maximum allowed by Google), you are giving more options to visitors to click on ad, and when you use only single bigger ad block which consists only four ads, they are likely to pay you more for each click your visitors make.
Best performing size:
It has been also proved and also said by the Google that the big rectangle ad block is the best performing ad block ever, so it’s always better to go with less blocks and big one instead of using lots of small ad blocks.
You should really know where to put ad block:
If you look at your site statistics like Google analytics report, you will notice the bounce rate, those are the numbers of visitors who leaved your site before reading enough or even scrolling down your webpage to content below the viewing area of screen. Hence if you will put your ads below the fold (viewing area of your webpage in normal computer screen without scrolling down), you will loss those outbound visitors without seeing your ads. And if you will put the ad block above the fold, there are chances that your ad block can give a better option to your visitors to leave your site in search of better content.
Darren Rowse, the founder and editor of problogger has shared his own experience ondoubling the Adsense income on his blog using these tips. Read more about how few changes can double your income on his blog.
Try These Best Alternatives of GoogleAdsense
Banned From Adsense??
Try These Best Alternatives of GoogleAdsense
List of Best Adsense Alternatives
1: 888 Media
888 Media is one of the best Adsense Alternative that i have personally used, their services are awesome and click rates are just like Adsense.
They Offer both type of Adds PPC or CMP* Great Earnings: Earn $0.20 to $0.40 Per Click or $0.20 to $0.70 per CPM
* Create your ad code(s) within minutes
* Track your earnings by login into your account
* Payment Methods : Paypal, Check, Bank Transfer
CLICK Here To Apply For 888Media
======================================
2: Yieldads
Yieldads is a very popular Advertising and Publishing Company, They are best for High Impression sites. They have very large network and various type of Advertising and Publishing options.
* Monetize your inventory
* Easy setup and installation
* Auto eCPM optimization to
* maximize earnings
* Detailed statistics
* Payment Methods : Paypal, Bank Transfer
CLICK Here To Apply For Yieldads
======================================
3: ChitikaChitika is one of the best Adsense Alternative, if you have US based trrafic to your site. A large number of webmasters are using chitika and they have very positive reviews about chitika, i recomend chitika only on US based Traffic
* Chitika charges advertisers to be featured alongside your site's content. At the end of every month you are paid based on the previous month's earnings (Net 30). Payments are sent after your account earns at least $10.00 (USD) for PayPal payouts or $50.00 (USD) for checks.
CLICK Here To Apply For Chitika4: Lijit
Lijit is Highly recomended by me for users who have large trrafic on US Based users. Their adds appear only in USA/Canada/UK. But you can set passback tag, which means an alternative add code that will be used when Lijit add not appear.
Means when a user browse your website from US/UK they will see Lijit add, and if user browse site from Pakustan/India etc.. they see the alternative add that you have set in Passback tag. You can use any of above with lijit pasback tag
Lijit pays on Impression, and its also recomended for big sites.
The Interesting thing about Lijit that i personlly liked, that they have 3 typs of widgets also to earn extra revenue, like google they have search widgets, you can add this search widget to your website to boost your earning with lijit adds
CLICK Here To Apply For Lijit
=======================================
5: InfolinksInfolinks is a very well known Advertisng and Publishing company, they provide text based adds. Adds appied on our site's content keyword. we can use infoliks along with any of above company. I recommend infolinks especially to bloggers who write reviewes, articles etc.
CLICK Here To Apply For Infolinks
Try These Best Alternatives of GoogleAdsense
In past few months, a very huge number of Pakistani & Indian Adsense Accounts got Banned. All Bloggers and webmasters are very depressed these days. But a very good saying we everyday listen that "If one door closed for us, God Opens lots of New Doors for us"
After A very deep search and practicals i have found some best Adsense Alternatives that we can use to earn revenue from our Blogs/websites/Forums. I will tell you 5 best Alternative of Adsense that i have personally used, and now i am telling this to all my friends who want to earn revenue from their sites
After A very deep search and practicals i have found some best Adsense Alternatives that we can use to earn revenue from our Blogs/websites/Forums. I will tell you 5 best Alternative of Adsense that i have personally used, and now i am telling this to all my friends who want to earn revenue from their sites
List of Best Adsense Alternatives
1: 888 Media
888 Media is one of the best Adsense Alternative that i have personally used, their services are awesome and click rates are just like Adsense.
They Offer both type of Adds PPC or CMP* Great Earnings: Earn $0.20 to $0.40 Per Click or $0.20 to $0.70 per CPM
* Create your ad code(s) within minutes
* Track your earnings by login into your account
* Payment Methods : Paypal, Check, Bank Transfer
CLICK Here To Apply For 888Media
======================================
2: Yieldads
Yieldads is a very popular Advertising and Publishing Company, They are best for High Impression sites. They have very large network and various type of Advertising and Publishing options.
* Monetize your inventory
* Easy setup and installation
* Auto eCPM optimization to
* maximize earnings
* Detailed statistics
* Payment Methods : Paypal, Bank Transfer
CLICK Here To Apply For Yieldads
======================================
3: ChitikaChitika is one of the best Adsense Alternative, if you have US based trrafic to your site. A large number of webmasters are using chitika and they have very positive reviews about chitika, i recomend chitika only on US based Traffic
* Chitika charges advertisers to be featured alongside your site's content. At the end of every month you are paid based on the previous month's earnings (Net 30). Payments are sent after your account earns at least $10.00 (USD) for PayPal payouts or $50.00 (USD) for checks.
CLICK Here To Apply For Chitika4: Lijit
Lijit is Highly recomended by me for users who have large trrafic on US Based users. Their adds appear only in USA/Canada/UK. But you can set passback tag, which means an alternative add code that will be used when Lijit add not appear.
Means when a user browse your website from US/UK they will see Lijit add, and if user browse site from Pakustan/India etc.. they see the alternative add that you have set in Passback tag. You can use any of above with lijit pasback tag
Lijit pays on Impression, and its also recomended for big sites.
The Interesting thing about Lijit that i personlly liked, that they have 3 typs of widgets also to earn extra revenue, like google they have search widgets, you can add this search widget to your website to boost your earning with lijit adds
CLICK Here To Apply For Lijit
=======================================
5: InfolinksInfolinks is a very well known Advertisng and Publishing company, they provide text based adds. Adds appied on our site's content keyword. we can use infoliks along with any of above company. I recommend infolinks especially to bloggers who write reviewes, articles etc.
- Earn 70% revenue share. The highest around. Guaranteed!
- Industry leading CTR!
- Big brand advertisers for all sites – big & small
- Our ads are more relevant to your readers
- Infolinks ads keep readers engaged & clicking
CLICK Here To Apply For Infolinks
Wednesday, 27 June 2012
Automatic Read More Hack For Blogger With Thumbnail
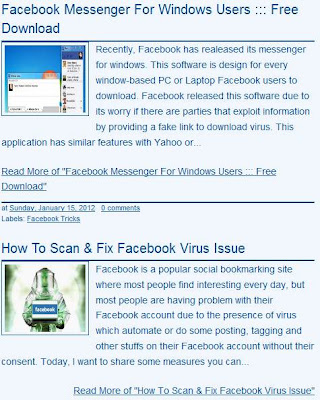
Today, I will try to explain how to summarize content and show only summary with a “read more” thumbnail in Home page, Archives Page and Label Page using Automatic Read More simple script in your template. Using automatic read more on your blog will make your blog load faster by showing few post instead of the full post on the homepage and it will also make your blog look professional.

Automatic read more for BlogSpot post can be done by inputting some code into your blog templates. Below are simple explanations on how to install Automatic Read More Hack for Blogger with Thumbnails and a snapshot of how it will look after the installation.
Now let’s start the installation:-
Note: before you make any changes on your templates, always make a back up of it.
Login in to your blogger account, then navigate to Layout section of your blog and then move to Edit HTML and use your mouse to mark “expand widget templates” box.
Then search for this tag: </head> . Use Ctrl F on your keyboard to search for it.
Now place the code below above the </head> tag in your templates:
<script type='text/javascript'>
summary_noimg = 300;
summary_img = 300;
img_thumb_height = 120;
img_thumb_width = 120;
</script>
<script type='text/javascript'>
//<![CDATA[

function removeHtmlTag(strx,chop){
 if(strx.indexOf("<")!=-1)
 {
  var s = strx.split("<");
  for(var i=0;i<s.length;i++){
   if(s[i].indexOf(">")!=-1){
    s[i] = s[i].substring(s[i].indexOf(">")+1,s[i].length);
   }
  }
  strx =  s.join("");
 }
 chop = (chop < strx.length-1) ? chop : strx.length-2;
 while(strx.charAt(chop-1)!=' ' && strx.indexOf(' ',chop)!=-1) chop++;
 strx = strx.substring(0,chop-1);
 return strx+'...';
}

function createSummaryAndThumb(pID){
 var div = document.getElementById(pID);
 var imgtag = "";
 var img = div.getElementsByTagName("img");
 var summ = summary_noimg;
 if(img.length>=1) {
  imgtag = '<span style="float:left; padding:0px 10px 5px 0px;"><img src="'+img[0].src+'" width="'+img_thumb_width+'px" height="'+img_thumb_height+'px"/></span>';
  summ = summary_img;
 }

 var summary = imgtag + '<div>' + removeHtmlTag(div.innerHTML,summ) + '</div>';
 div.innerHTML = summary;
}

//]]>
</script>
Note in above codes you can change the numeric numbers according to how you wish it appears on your blog.
summary_noimg = 430; this code will decide how much characters must be shown in the post if that post doesn’t contain any images. I have selected 430 characters. You can customize it to suit your template
summary_img = 340; If the post contains image, then this code will decide how many characters must be shown in that post. Change the number of characters to be shown to suit your template.
img_thumb_height = 100; this tag decides the height of the thumbnail to be shown in the post. Vary the number 100 to suit your template.
img_thumb_width = 120; This tag decides the width of the Thumbnail image to be shown.
Now find
<data:post.body/> in your template and replace it with the codes below:
<b:if cond='data:blog.pageType != "static_page"'>
<b:if cond='data:blog.pageType != "item"'>
<div expr:id='"summary" + data:post.id'><data:post.body/></div>
<script type='text/javascript'>createSummaryAndThumb("summary<data:post.id/>");</script>
<div class='readmore-wrap'>
<span class='rmlink' style='font-weight:bold;padding:5px;float:right;text-align:right;'><a expr:href='data:post.url'>Read More</a></span>
</div>
</b:if>
</b:if>
<b:if cond='data:blog.pageType == "item"'><data:post.body/></b:if>
<b:if cond='data:blog.pageType == "static_page"'><data:post.body/></b:if>You can now preview your template and then save it.
It will look like this:
For help, use the comment box below.
Monday, 25 June 2012
How to create a 'search description' for your Blogger post
How to create a 'search description' for your Blogger post
This post is for people who use Blogger.
Blogger has recently introduced new functionality to its software for blogging. Within the new template there is now a new option to include a meta description for the blog AND each individual blog post.
To do this, you should:
Once you've done this, your indexed blog post will show up with the correct description. This is the one for yesterday's post
This is also the description which will show up if you promote your blog post on Facebook.
Extra! For those who want to know more about site description check out Google's Search Engine Optimisation Starter Guide (pdf). This is what it has to say about "best practice"
Do tell me whether or not you decided to try enabling this functionality and how you got on using these instructions.
- It introduces you to the new functionality within Blogger which allows you to write an individual summary descriptions for each of their blog posts.
- It also explains how this improves the post's listing by search engines - and may well improve the number of visitors - via search - to your blog too
Blogger has recently introduced new functionality to its software for blogging. Within the new template there is now a new option to include a meta description for the blog AND each individual blog post.
Meta elements provide information about a given Web page, most often to help search engines categorize them correctly. They are inserted into the HTML document, but are often not directly visible to a user visiting the site.Wikipedia - Meta element
The meta description says what your blog or post is about - but doesn't appear on your blog. However it does appear in the listing for the post in a search engine index.
Various attempts by some to manipulate search engine rankings have led to some meta tags becoming much less influential than they used to be - keywords being a case in point.
However a meta description is still used by search engines, particularly if it accurately reflects the content of the post (eg text or the alt tags on an image)
Why describe your blog post in summary?
Prior to implementation of the new functionality, the snippets used for my blog posts which had been indexed were usually
However if YOU create a 'search description' for your blog post, this means YOU - rather than Google or the other search engines - get to define how that post is summarised when indexed by a search engine. You are not left to the tender mercies or whims of the different search engines!
In other words, if you want people to visit your blog YOU can now define the best way of describing your post in Google. For all visits generated by a search, this will improve the chances of people clicking the link in the search results and visiting your blog as a result and finding what they wanted. It may well improve traffic to your blog as a result.
However the description only works to best effect if it accurately describes the content of the blog post eg repeats words used in the text.
How to describe a blog post
There are two stages to this.
Contents of ? button next to "Description"
You should:
Various attempts by some to manipulate search engine rankings have led to some meta tags becoming much less influential than they used to be - keywords being a case in point.
However a meta description is still used by search engines, particularly if it accurately reflects the content of the post (eg text or the alt tags on an image)
Why describe your blog post in summary?
Prior to implementation of the new functionality, the snippets used for my blog posts which had been indexed were usually
- either the first sentence of the post
- or the labels/categories identified for the post.
However if YOU create a 'search description' for your blog post, this means YOU - rather than Google or the other search engines - get to define how that post is summarised when indexed by a search engine. You are not left to the tender mercies or whims of the different search engines!
In other words, if you want people to visit your blog YOU can now define the best way of describing your post in Google. For all visits generated by a search, this will improve the chances of people clicking the link in the search results and visiting your blog as a result and finding what they wanted. It may well improve traffic to your blog as a result.
However the description only works to best effect if it accurately describes the content of the blog post eg repeats words used in the text.
How to describe a blog post
There are two stages to this.
- The first stage only needs to be done once as it enables the description functionality and sets a description for the blog.
- The second stage relates to the description of the blog post and needs to be done for every individual post you want to describe.
Stage 1: Enable the meta description functionality in Blogger
Set the blog's search descriptionHelp users choose to click on your blog in search results by writing a compelling summary of what your blog is all about. Learn more.Contents of ? button next to "Description"
You should:
- view the dashboard of your Blogger blog
- Go to "Settings"
- Click "search preferences"
- Find "Meta Tags". This should indicate the default option - ie the description is disabled.
- Click "edit" button re. "Description"
- Click "Yes" button to enable search description functionality
- Create a meta description for your blog in l50 characters or less. (Use Letter Count - set to the character option if you want to check.) This is the description which will appear on your home page - see example below.
- Click 'save changes' button
When I travel, I sketch. When I sketch on my travels I record it here. Plus information about places I visit and links for those who want to know more
 |
| Menu of post settings in Blogger AFTER search description has been enabled (in Stage 1) |
Stage 2: Create a search description in Blogger
In the Blogger Post edit view, you can insert a 'search description' when you create a post or edit it.To do this, you should:
- view your dashboard for your Blogger blog
- Go to "posts"
- EITHER create a new post OR select a post to edit
- View the Post Settings on the right hand side of the edit view. This includes 'Search description' (as illustrated on the right) - but only if you have acted on Stage 1 above. Otherwise the setting is missing.
- Click on 'Search Description' and a window box appears
- Enter a brief and accurate (meta) description of the post in the window. This will be the text used in a search engine listing.
- Try and make sure you use 150 characters of plain text or less (recommended by most reputable sources).
- click done
 |
| Example of a search description for an individual Blogger blog post |
 |
| Meta 'search' description for yesterday's blog post |
Extra! For those who want to know more about site description check out Google's Search Engine Optimisation Starter Guide (pdf). This is what it has to say about "best practice"
Accurately summarize the page's contentand
Write a description that would both inform and interest users if they saw your description meta tag as a snippet in a search result.
Avoid:
- writing a description meta tag that has no relation to the content on the page
- using generic descriptions like "This is a web page" or "Page about baseball cards"
- filling the description with only keywords
- copying and pasting the entire content of the document into the description meta tag
Use unique descriptions for each page
Having a different description meta tag for each page helps both users and Google, especially in searches where users may bring up multiple pages on your domain (e.g. searches using the site:operator). If your site has thousands or even millions of pages, hand-crafting description meta tags probably isn't feasible. In this case, you could automatically generate description meta tags based on
Avoid:using a single description meta tag across all of your site's pages or a large group of pages
Do tell me whether or not you decided to try enabling this functionality and how you got on using these instructions.
Sunday, 24 June 2012
5 Ways to Increase Your Blog’s Visibility
When you first started your blog you probably had no idea what it would take to gain a strong readership, and you might not even have cared. But what usually starts as a hobby can quickly morph into a dedicated pastime and even a potential career, and growing your blog’s audience and expanding its reach suddenly moves up in importance. Starting a blog is the easy part; all you need to do is decide on an URL and blogging platform and start regularly posting new content. However getting your blog to the point where it has a high visibility and is regularly being exposed to new readers is a little trickier. If you’re trying to increase your blog’s visibility and gain new traffic, here are five ways that can help you out:
Guest post on other blogs – One of the easiest ways to increase exposure, guest posting should be high on your priority list of things to do for the blog. Providing unique content for other blogs is a great way to not only get your blog’s name out there, but also give the host blog’s readers a chance to preview what type of content you write and what your writing style is. Readers that enjoy your writing can then click over to your blog and become regular readers there as well.
Learn the magic of SEO – Search Engine Optimization, more commonly known as SEO, is a website’s best friend when it comes to making it more searchable and more easily found. Through several different SEO tactics you can get better indexed on the major search engines which will give your blog more exposure and drive more traffic to your website.
Use the power of social media – There is a reason that so many people are regularly implementing social media into their marketing ploys: it works at an astounding rate. Promoting your blog on Facebook and Twitter alone gives you exposure to hundreds of thousands of potential new readers every day, and it would be a huge mistake not to leverage that.
Become an active participant in the blogging community – Whether it’s joining in on a weekly Twitter chat (almost every niche has them) or participating in blog challenges and round-ups, there is always something you can join in on that will help you promote your blog and expose it to new readers. If you’re serious about growing the blog you have to get involved.
Comment often on both blogs you regularly read and blogs that are new to you – Every comment on a blog opens a door to gaining new readers to your own site. By commenting frequently on blogs you regularly read you can build relationships with those bloggers. By seeking out new-to-you blogs and commenting there, you expand your potential audience and increase your networking.
High traffic and blog visibility don’t happen overnight and don’t occur simply through good luck or well-written content; they are a direct result of a dedicated approach to increasing your blog’s reach to its readers, both new and old alike.
Author Bio:
Kate Croston is a freelance writer, holds a bachelors degree in Journalism and Mass Communication. She writes guest posts for different sites and loves contributing business internet service related topics. Questions can be sent to: katecroston.croston09[at]gmail.com.
Top 6 free Proxy Websites for Anonymous surfing
Proxy website are used then you are not allowed to access a website, it may be blocked in your country, school, college, offices, these are the best free proxies by which you can surf the web when website are blocked in your area, you can also use them to surf anonymously on the web without leaving any indentification of yours.
Proxies works on clients request when you visit a proxy website you will see a text area where you can put any URL and the proxy servers open that URL for you. Like you live in India and some websites are blocked in India and you want to Open that then you can use a US based Proxy or proxy of any other country where that website is not blocked by their country.
aniscartujo.com(Best for Downloading Torrent)
Fetch4.me
Free-Proxy.me
NewIPNow.com
Open-browser.com
SurfMo.com
HidemyAss.com
Subscribe to:
Posts (Atom)


